Mastering Simple Hair Drawing in 2025: A Comprehensive Guide
Related Articles: Mastering Simple Hair Drawing in 2025: A Comprehensive Guide
Introduction
In this auspicious occasion, we are delighted to delve into the intriguing topic related to Mastering Simple Hair Drawing in 2025: A Comprehensive Guide. Let’s weave interesting information and offer fresh perspectives to the readers.
Table of Content
Mastering Simple Hair Drawing in 2025: A Comprehensive Guide

Drawing realistic hair can feel daunting, especially for beginners. However, achieving believable and appealing hair doesn’t require mastering photorealism. This guide focuses on simplifying the process, offering techniques accessible to all skill levels, and incorporating modern digital tools and trends prevalent in 2025. We’ll cover various hairstyles, hair types, and approaches, ensuring you can confidently sketch flowing locks, bouncy curls, or sharp, stylish cuts.
I. Understanding the Fundamentals: Structure over Detail
Before diving into specific techniques, understanding the underlying structure of hair is crucial. Forget about drawing individual strands initially. Instead, think of hair as a mass, a collection of strands forming shapes and volumes. This "mass" approach simplifies the process significantly.
A. The Basic Shapes: Begin by sketching the overall shape of the hair using simple geometric forms:
- Circles and Ovals: These are ideal for representing the bulk of the hair, particularly at the crown or the ends.
- Triangles and Cones: These capture the tapering effect of hair, especially at the nape of the neck or the ends of ponytails.
- Rectangles and Squares: Useful for representing straight, blunt cuts or sections of tightly bound hair.
These basic shapes serve as your foundation. Refine them gradually, adding subtle curves and undulations to create a more natural look.
B. Light and Shadow: Hair, like any other object, interacts with light. Understanding how light falls on the hair mass is essential for creating depth and volume. Identify:
- Light Source: Determine the direction of the main light source. This will dictate where the highlights and shadows fall.
- Highlights: These are the brightest areas, usually found where the light directly hits the hair.
- Midtones: These are the areas between the highlights and shadows, representing the majority of the hair mass.
- Shadows: These are the darkest areas, often found under the hair mass or in the recesses between strands.
Using these elements effectively will give your hair drawings a three-dimensional quality without excessive detail.
II. Different Hair Types and Styles: Simplified Approaches
Let’s explore techniques for various hair types and styles, keeping the focus on simplicity and efficiency:
A. Straight Hair:
- Block it out: Start with a basic shape, perhaps a rectangle or oval, representing the overall mass of the hair.
- Subdivide: Divide the shape into smaller sections to indicate subtle variations in volume and flow.
- Refine the edges: Gently curve the edges of the sections to create a more natural look. Avoid sharp, rigid lines.
- Add highlights and shadows: Use light strokes to indicate highlights where the light hits the hair, and darker strokes to represent shadows within the mass. Keep the transitions between light and shadow smooth.
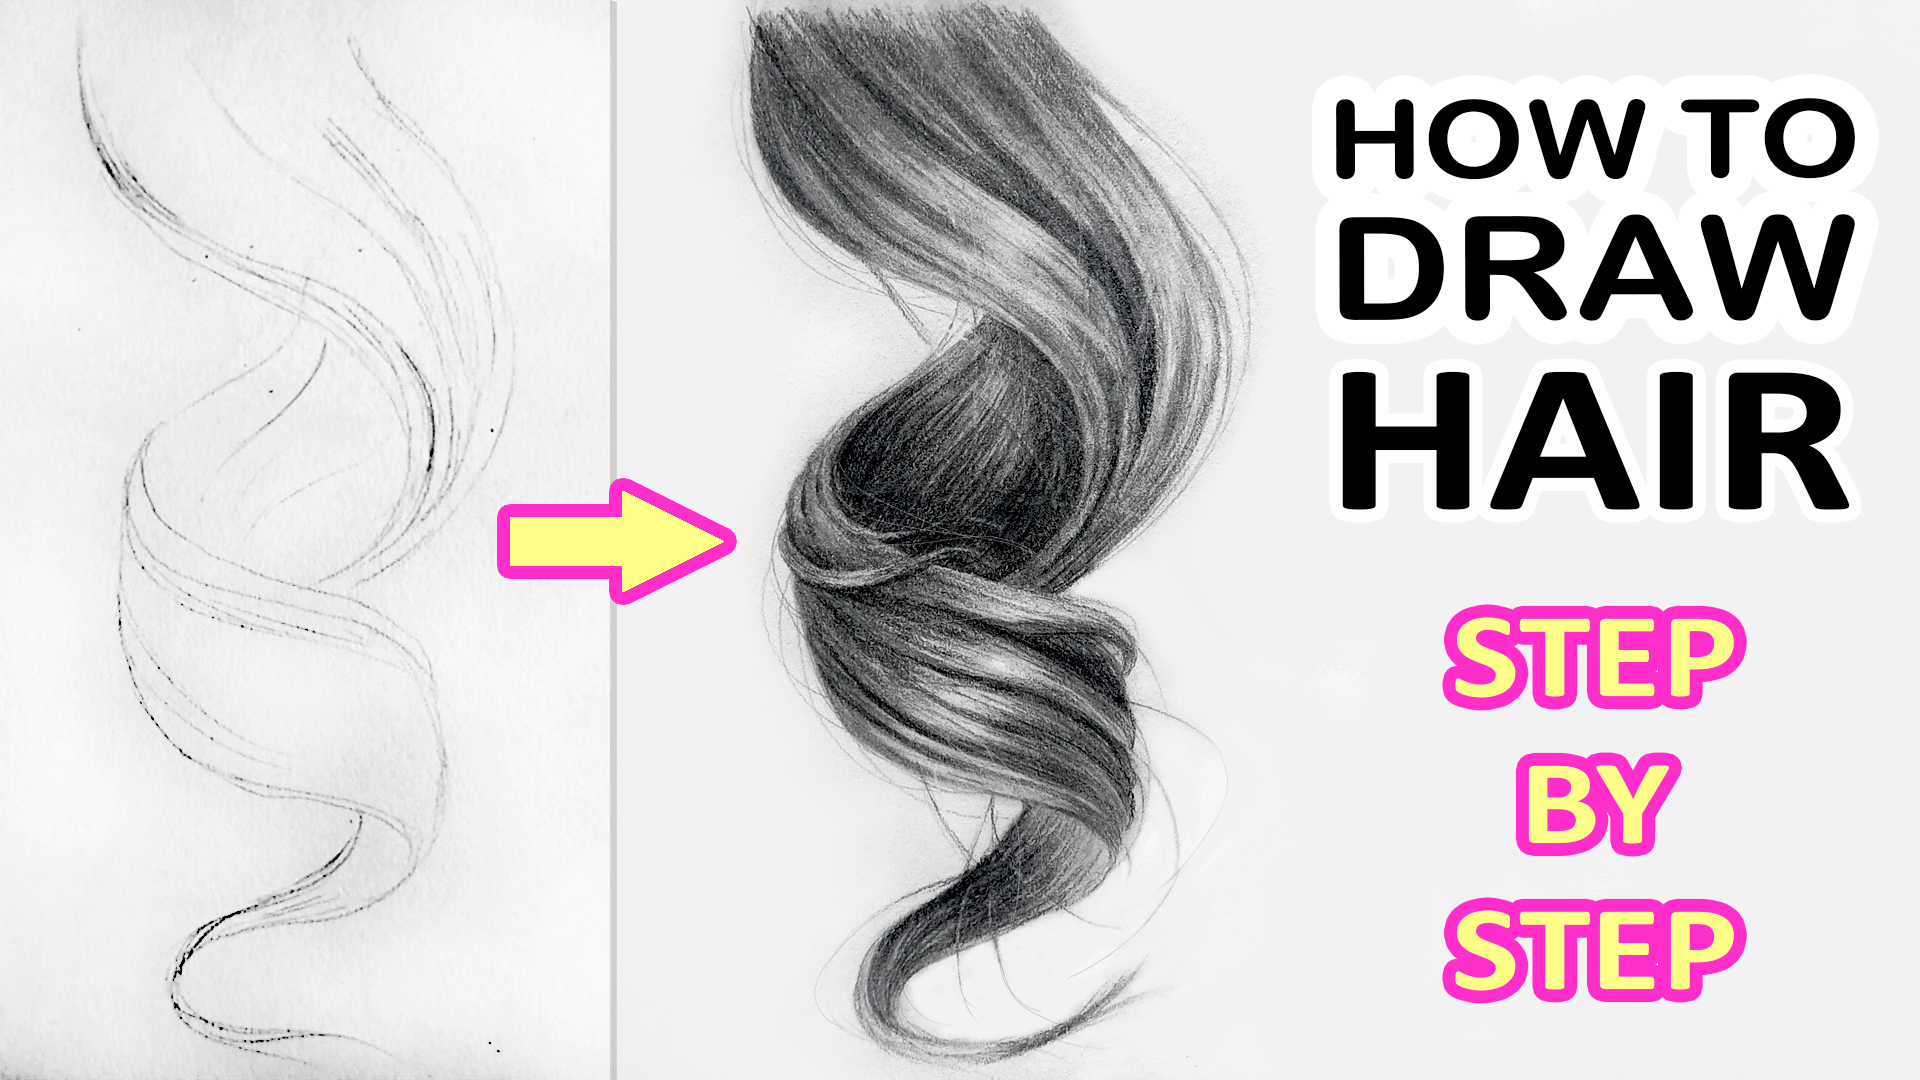
B. Wavy Hair:
- Curved shapes: Begin with curved shapes, such as elongated S-curves or gentle waves, to represent the overall flow of the hair.
- Vary the curves: Don’t make all the waves uniform. Vary their size and curvature to create a more natural and dynamic look.
- Suggest strands: Instead of drawing individual strands, use short, curved lines to suggest the direction and texture of the waves.
- Highlight the curves: Use highlights to accentuate the curves and create a sense of movement.
C. Curly Hair:
- Circular shapes: Start with overlapping circles or ovals to represent the curls.
- Vary the size: Vary the size of the circles to create a more realistic and less uniform look.
- Suggest volume: Use shading to create volume within each curl. Darker tones in the recesses and lighter tones on the outer edges will enhance the three-dimensionality.
- Define the curls: Add subtle lines to suggest the individual curls, but avoid over-detailing.
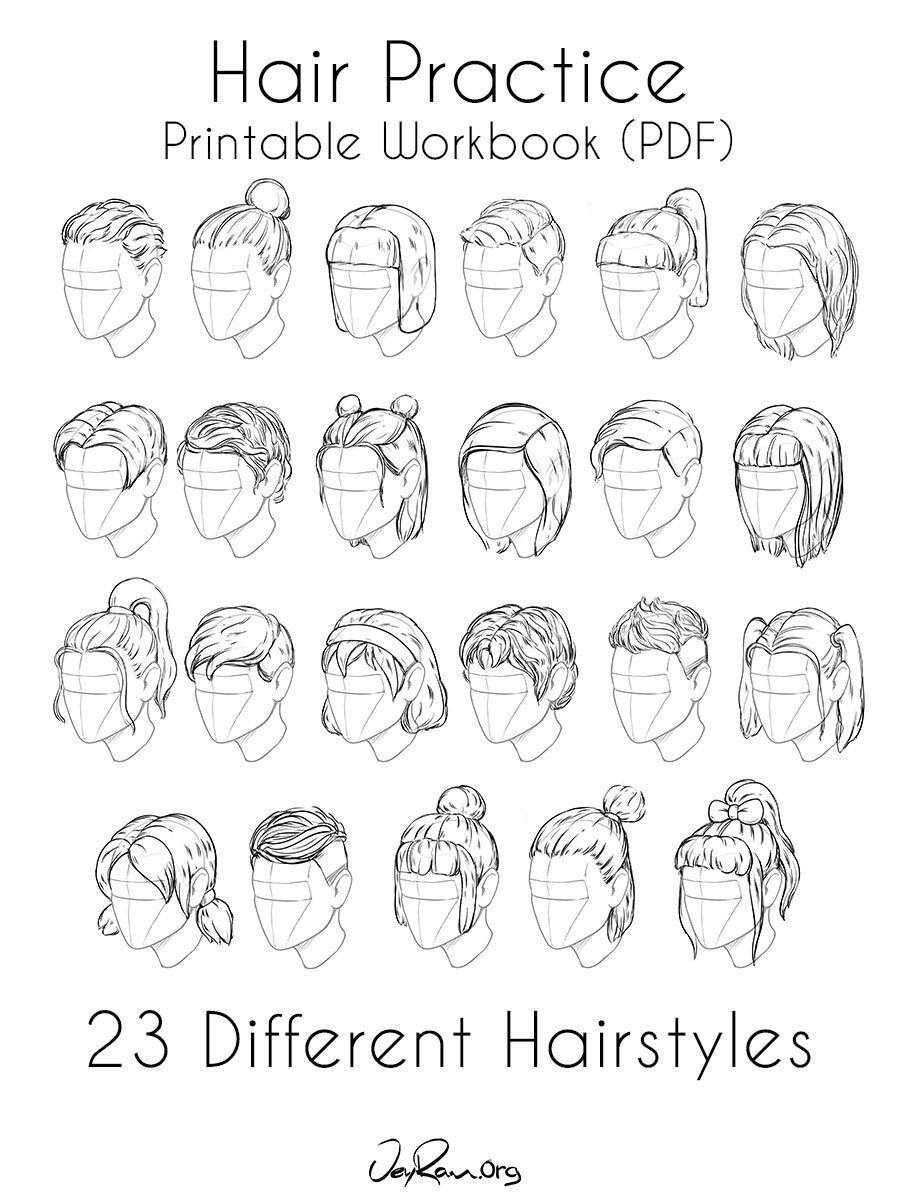
D. Short Hair:
- Basic shapes: Use simple geometric shapes to represent the overall form of the hairstyle.
- Define the edges: Pay close attention to the edges of the hairstyle, as they play a crucial role in defining the shape and style.
- Add texture: Use short, quick strokes to add texture to the hair, suggesting the direction of the strands.
- Light and shadow: Use light and shadow to create depth and volume.
III. Incorporating Digital Tools in 2025:
The year is 2025, and digital art tools have significantly advanced. Leveraging these tools can enhance your hair drawing process:
A. Digital Painting Software: Procreate, Photoshop, Clip Studio Paint, and other software offer various brushes specifically designed for simulating hair. Experiment with different brush settings to achieve different textures and effects.
B. Smart Brush Technology: Many modern software programs now incorporate AI-powered smart brushes that can assist in creating realistic-looking hair with minimal effort. These brushes often use algorithms to automatically generate strands and textures, significantly speeding up the process.
C. Layer Management: Utilize layers effectively. Create separate layers for the base shape, highlights, shadows, and individual strands (if adding detail). This allows for non-destructive editing and easy adjustments.
D. Reference Images: While focusing on simplification, using reference images is still beneficial. Observe how light interacts with hair in real-life photos and use this information to inform your drawings.
IV. Advanced Techniques (Optional):
Once comfortable with the basics, you can explore more advanced techniques:
- Strand Rendering: For a more detailed approach, carefully draw individual strands, but group them logically to avoid overwhelming the drawing.
- Hair Flow and Movement: Pay close attention to the direction and flow of the hair, particularly in dynamic poses.
- Texture Variation: Vary the texture of the hair within the drawing to create a more realistic look. Some areas might be smoother, while others could be more textured or frizzy.
- Hair Accessories: Incorporate hair accessories like headbands, clips, or braids to add visual interest.
V. Practice and Experimentation:
The key to mastering any drawing skill is practice. Start with simple sketches, gradually increasing the complexity of your hairstyles and hair types. Experiment with different techniques and tools to find what works best for you. Don’t be afraid to make mistakes; they are valuable learning opportunities.
By focusing on understanding the underlying structure of hair, simplifying your approach, and utilizing the power of modern digital tools, you can achieve impressive results even without drawing individual strands meticulously. Remember, the goal is to create believable and appealing hair, not photorealistic perfection. Enjoy the process, and let your creativity flow!


Closure
Thus, we hope this article has provided valuable insights into Mastering Simple Hair Drawing in 2025: A Comprehensive Guide. We hope you find this article informative and beneficial. See you in our next article!